- There are 6 different registration types: normal, selection, available, all are registered, no registrations, and member colors
What are the different registration types?
Diese Funktion kann nur am PC verwendet werden.
Here we explain the difference between the various registration types you can choose from:
Normal
The normal registration type, where a person registers for the activity, indicating whether he/she can come or not.
The registrations are automatically closed when the maximum number of participants is reached.
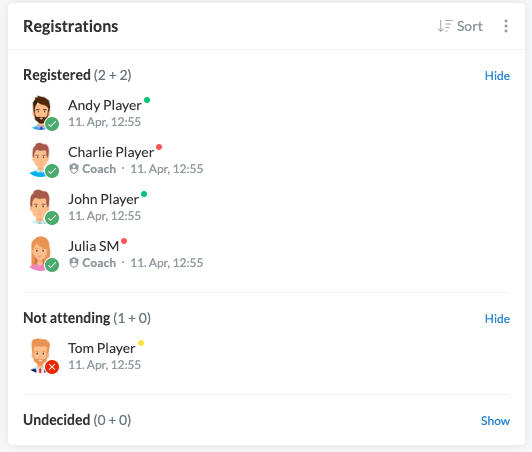
NOTE: As a trainer, you can register and unregister people for activities. Click the three small dots in the Registration field and then click Registration.
Selection
This selection type can be used if you as a trainer want to select who can register for the activity. This means that only selected people can register at the end.
- Choose the selcection type Available when creating the activity
- After creating the activity, click in the Registration field.
- Click Registration
- Now click the orange button to add one or more persons to the activity
- Finish this process by clicking the green Save button
The selected team members will now have the option to log in or log out - just like the normal selection type.

NOTE: As a trainer you always have the possibility to register or deregister members directly without having to select them beforehand.
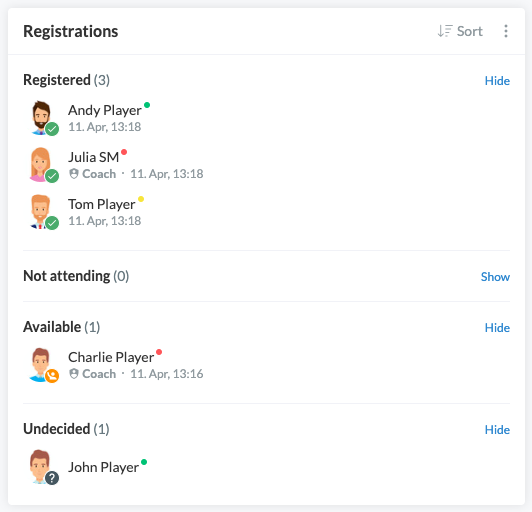
Available
Members make themselves available. After that, it is your task as a trainer to register certain members.
So this selection type works practically opposite to Selected, where you can select members who can then sign up.
When creating an activity, choose the selection type Available. The members can now make themselves available. You can then register them as follows:
- Choose the selcection type Available when creating the activity
- After creating the activity, click in the Registration field.
- Click Registration
- Now click the green button to add one or more persons to the activity
- Finish this process by clicking the green Save button
Everybody is attending
This selection type can be used when all team members should be listed as logged in for a specific activity. This means that members must actively sign out here if they cannot attend the activity.
This type of selection is typically used for fixed weekly training times where members are expected to show up. This way, members are actively asked to let you know if they cannot attend.
No registrations
This selection type can be used if you don't want people to be able to sign up for the activity. So instead you can indicate that an activity is taking place.
Member colors
This selection type allows the selection of members based on previously assigned member colors.
- When creating an activity, choose the selection type Member colors
- Select at least one member color here
- Finish this process with the green Save button
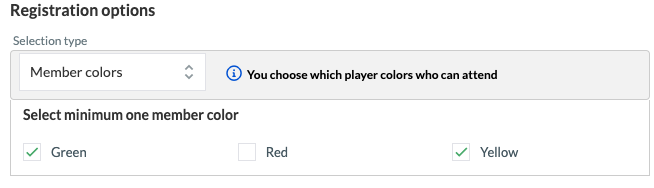
In the activity you can then see that exactly the member color(s) has been selected.

These members can now sign up for the activity.
War dieser Artikel hilfreich?
0 von 0 fanden diesen Artikel hilfreich